If you are not tech-savvy and are looking for an easy way to view security cameras remotely using the Internet, then this guide is for you. If you connect your camera to the recorder and can view the camera using a monitor connected to the writer, follow this guide to learn how to remotely view your system without repeating costs.
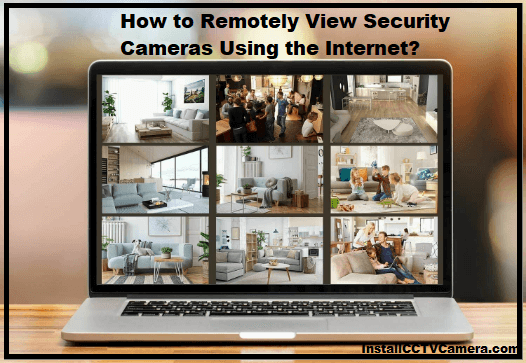
How to view security cameras remotely using the Internet?
There are many options for viewing the camera remotely using the Internet. You can access the DVR/Server using Internet Explorer or by loading the Remote View software on a remote PC.
The remote View software is on the CD provided with the EZWatch Pro DVR. Internet Explorer allows remote access to the most common DVR functions, such as viewing cameras and playing recorded video clips.
For systems that do not use Internet Explorer to view web pages or designs that restrict the installation of Active X controls, remote viewing software can be used as an alternative way to connect and view the camera remotely.
1. Set up Internet Access using EZWatch IP Service
Ensure the EZWatch Pro DVR/Camera Server is connected to ensure the net. This can be DSL, cable, or dial-up. Ensure you can surf the web before moving on to the next step.
Log on to the EZWatch IP website www.ezwatchip.com using the DVR/Camera Server. Click the Sign-Up tab and follow the steps to enter your information. After entering all the information, click the download link and save the EZWatch IP Setup program to your computer.
Remember where you saved this program to find it when you are ready to run the installation.
Once the software download is complete, click the EZWatchIP-Setup.exe icon and click Run to install the EZWatchIP software. Follow the steps shown. If the program does not automatically open the login screen after installation, click the red EZWatchIP icon on the desktop.
This will open a login screen where you enter the username and password you created when you signed up for the service. After entering the information, click the Start Update button, and you are done. This will send your first communication to our IP servers and activate your account.
If you are experiencing problems up to this point, please call our technical support representative at 1-866-241-3400 for assistance. When you click the Start Update button, the login screen disappears, and a round red EZWatch IP icon appears on the taskbar. This icon indicates that the service is working.
The EZWatchIP program checks to see if the public IP address has changed every 30 minutes. If so, the domain name you created (e,g test.ezwatchip.com) will now be changed, and we will send a new address to our system so you can access your system remotely.
2. Install viewing software
Your CCTV provider may own the viewing software. The best CCTV providers have intelligent apps you can install on any mobile device and then track directly. Companies like Pro-Vigil provide viewing software for free that you can download to your mobile device.
There are also third-party viewing vendors that can help you view CCTV cameras from anywhere using the Internet. In general, you need to match the model of your security camera to the software that supports your system. Or call your CCTV provider and ask how you can get this vital upgrade.
The days of old CCTV cameras and DVR systems are over. Today, CCTV cameras can be viewed anywhere using the Internet. Instead of wondering what images await when you return to work, you can view CCTV cameras online on your phone.
3. Register for a FlexiHub account
Register for a FlexiHub account to choose the subscription plan that suits you best and start your free trial. Start by physically connecting the security camera to the computer (server). Then install the FlexiHub software on both the server and the remote computer to access the camera remotely.
Launch the software on both computers using the same login credentials to share your safety camera over the web. Click Connect on the remote computer to access the security camera. What if you cannot view your security camera remotely using the web via port forwarding
4. Remote access settings
Connect the security camera’s digital video recorder (DVR) to the network router using a Cat-5 network cable. Open a browser and log in by sorting the router’s local IP address within the browser’s address bar. Ask the provider for the exact IP address of the router, but the example looks something like this: http://192.168 .1.1.
After logging into your router’s configuration panel, create a passionate or static IP address for the camera within your router’s Local Area Network (LAN) settings.
If the camera has a zealous IP, it can access it directly without conflicting with other devices within the network. You should also note the subnet mask number (255.255.255.0 in most cases). You will need this information later.
Next, we want to sort the router’s port forwarding against the camera’s IP address. This allows special devices to access the camera. Enter the camera’s camera’s IP address and set it to forwarding port 80.
To forward one port, repeat the method for all specified ports on the camera. When port forwarding is complete, power on the camera to access the network menu.
Attend the networking setup to settle on a static IP address. Enter the IP address and subnet mask number assigned to the camera. Double-check that the port on the camera matches the port you passed through the router, then save the settings.
Enter the external IP address used outside the LAN into an Internet browser. To view your external IP address, visit whatismyip.com and duplicate the listed IP address. You will then be prompted to enter an ActiveX control on the camera’s web server. Then you will be ready to access your camera online.
Troubleshoot Remote View Issues
1. P2P settings remain offline and do not show online.
All of you have successfully enabled DHCP. If the recorder is not given a new IP address immediately, reboot the device using the software reboot button at the top right of the screen or unplug and reconnect the recorder.
Appropriate DNS settings are enabled. If you default the recorder to DHCP, it should automatically get DNS settings. If not, we recommend manually setting DNS 1 to 8.8.8.8 and DNS 2 to 8.8.4.4, also known as primary and secondary DNS servers.
You are not using Orbi, Google wifi, or any other mesh network device with poor wired network support. Connect the recorder directly to your Internet service provider’s router or modem.
2. Why when I view a video in the app, only one camera is displayed on my DVR or NVR?
The reason behind this is the device was not added correctly. After scanning the peer-to-peer serial number, you must select the correct device type when adding the device. For DVR and XVR, set the DVR/XVR option. For NVR, select NVR. See the snapshot below showing where to choose the appropriate device type.
If you have successfully added your NVR or DVR with the correct device type, you still only see 1 or 4 cameras. It would help if you learned how to use the app. Once the app is connected, you can access any camera attached to the system.
Click the following links to use the app’s live view and playback features and learn how to cycle through channels or change the grid screen options to see more channels—iPhone iPad app guide to remotely viewing security cameras.
3. Why does remote view not work while off wifi, and has an antivirus app on my phone?
The antivirus is blocking the phone from accessing the remote viewing service. You need to add an exception for the app in your antivirus software settings so that the app can communicate freely over the Internet. Without internet access, apps will not always be able to access the system remotely.
Frequently Asked Questions
How can I see my security camera on my phone?
After you’ve confirmed that you can connect your surveillance device to your smartphone, it’s only four steps to enjoy your security cameras on the go. You can now set up streaming surveillance on your smartphone very easily. Scanning the QA code can connect your surveillance camera to your smartphone. Regardless of your OSg, here’s how to tie a surveillance camera to your smartphone.
Install the security camera’s mobile app on your smartphone. Then start the application and add the device. Connect the camera to a wifi router. Click on the device name in the app to enjoy live streaming of the surveillance on your phone.
How to connect a CCTV camera to a mobile phone without the Internet?
If you have an NVR system and want to connect to the camera without the Internet, here’s how to connect your security cameras to your smartphone. This approach is simple. Nevertheless, check the app’s instructions for any additional actions that may be required.
Buy a SIM card that fits your phone. A SIM card must be inserted into the surveillance camera. Install the monitoring system. Integrate the installed camera into the app. Finally, choose to view the security camera.
How is the wireless security camera powered?
As the name suggests, wireless cameras are not connected to a power port. They have a set of removable or non-removable batteries. These batteries are rechargeable by most brands. Nevertheless, there are brands of smart surveillance cameras that use non-rechargeable batteries. This means that the battery needs to be replaced from time to time.
If you have a rechargeable battery, you must remove and charge it or bring your camera to capture. Surveillance cameras often have long-lasting batteries. This means you don’t need to recharge too often.
Is your wireless camera conflicting with the signal from your wifi router?
Wireless security cameras do not interfere with the functioning of the wifi connection. Conflicts between the wifi signal and the CCTV camera can affect the wifi connection speed, the range of the wifi router, and the recorded video’s frame rate. In many situations, this is probably undetectable.
Transmission conflicts between surveillance cameras and wifi routers do not result in loss of data transmitted from the access point or changes to the settings page.
Conclusion
Remotely access your security cameras to monitor what your loved ones are doing 24/7.