Most security camera systems today are designed to be installed quickly and without the need for professional service. You only need to know the ideal location to maximize your camera’s range.
Here is how to install a CCTV camera step by step guide
Simple steps to complete CCTV installation.
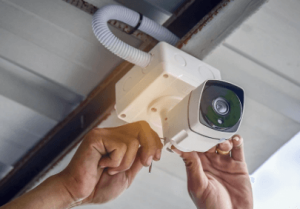
1. CCTV camera mount
Mark the points where the brackets will be attached for mounting. After drilling the hole, insert the raw plug before screwing the frame. For wired cameras, you must run the wiring back through the wall to connect to the monitoring source. So make sure the hole is big enough to pull the wire through.
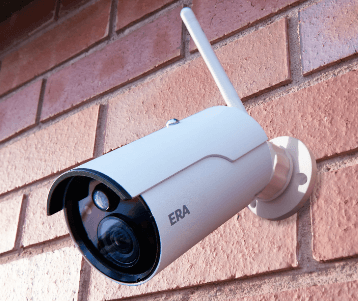
Attach and secure the camera. Plug the power cord into the socket. Some wireless cameras work without a power card but require battery pack recharging.
2. DVR
The DVR of CCTV is where the hard disk for monitoring is located. So all CCTV recordings are inside the DVR. Keeping the DVR in a locked compartment is recommended so that if an intruder discovers the DVR, it cannot destroy the recorded video. This is an essential step towards ensuring your home’s bulletproof security system.
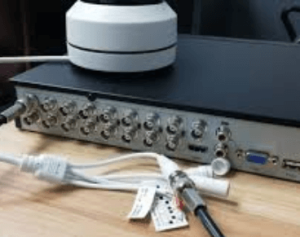
On the other hand, wireless CCTV cameras use Network Video Recorders (NVRs) instead of DVRs, which can be installed similarly.
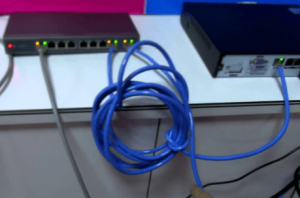
3. Cable Placement
Plan the cable route from the camera to the DVR. Place them under the carpet, near skirting boards, or ceiling cornices if working with indoor cables. For outdoor cameras, use wire molding to keep lines stable and secure from damage.
Connect the network cable to the Internet router. IP cameras use Cat 5 or Cat 6 cables, while analog HD cameras require BNC cables and DC pin connectors.
The video cable connects through the BNC port. Now remove about 1.5 cm of the outer sheath of the video cable where the braid should be exposed. Slide the crimping barrel over the line with a broader diameter towards the end of the line. Now remove the white insulation covering the innermost tube.
Insert this exposed cable into the BNC port and tighten the crimp barrel. This will establish a secure connection. Connect the DVR output port to the screen you want the video feed to.
4. Connect DVR to the screen
Connect each camera to a DVR or NVR. Then connect your DVR to the screen you want the video feed to. It is recommended to use HDMI to the monitor for higher resolution.
5. Final step
Once everything is connected and powered up, power on the camera emphasizes the display and DVR. Set up the DVR according to the instruction manual provided with the DVR.
Review the feeds from all cameras to ensure each camera works correctly and provides the desired field of view. If some cameras are not working, check your connection and network clips.
Wired CCTV cameras can be challenging to install, especially if you know nothing about cables. Choose a wireless camera instead for quick and easy installation. It relies on its wireless receiver to stay connected, eliminating the need for complex cabling plans. Make sure each camera is within range of the central hub.
Conclusion
As you can see from our article on installing CCTV, there are quite a few parts, and some DIY experience is required to complete the installation effectively. This process to install CCTV achieves high-quality, long-lasting installation results.